
Microsoft has rolled out the June 2026 Patch Tuesday update, KB5094126 (OS Builds 26200.8655 and 26100.8655), and one of its most talked-about inclusions is the Low Latency Profile. Microsoft slipped it into the changelog under the generic label: “[General Performance] This update accelerates app launch and core shell experiences such as Start menu, Search, and Action Center.”
If you have been following our coverage, you already know what Low Latency Profile is. We first tested it back in May, and we reported in advance that it would arrive with the June security update. And it did. But just because KB5094126 is now installed on your PC does not mean Low Latency Profile is already making core Windows shell experiences faster.
So, here is our detailed guide to check if your PC has Low Latency Profile enabled, and if not, we’ll tell you how you can force enable it. Of course, we have also included screen recordings of before and after enabling the feature.
What is Windows 11’s Low Latency Profile, and what does it do?
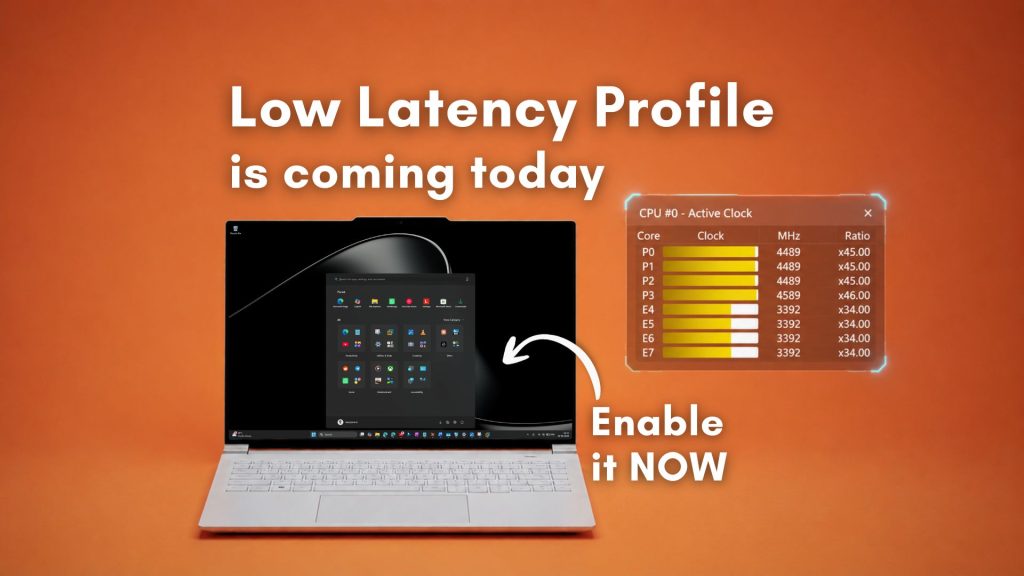
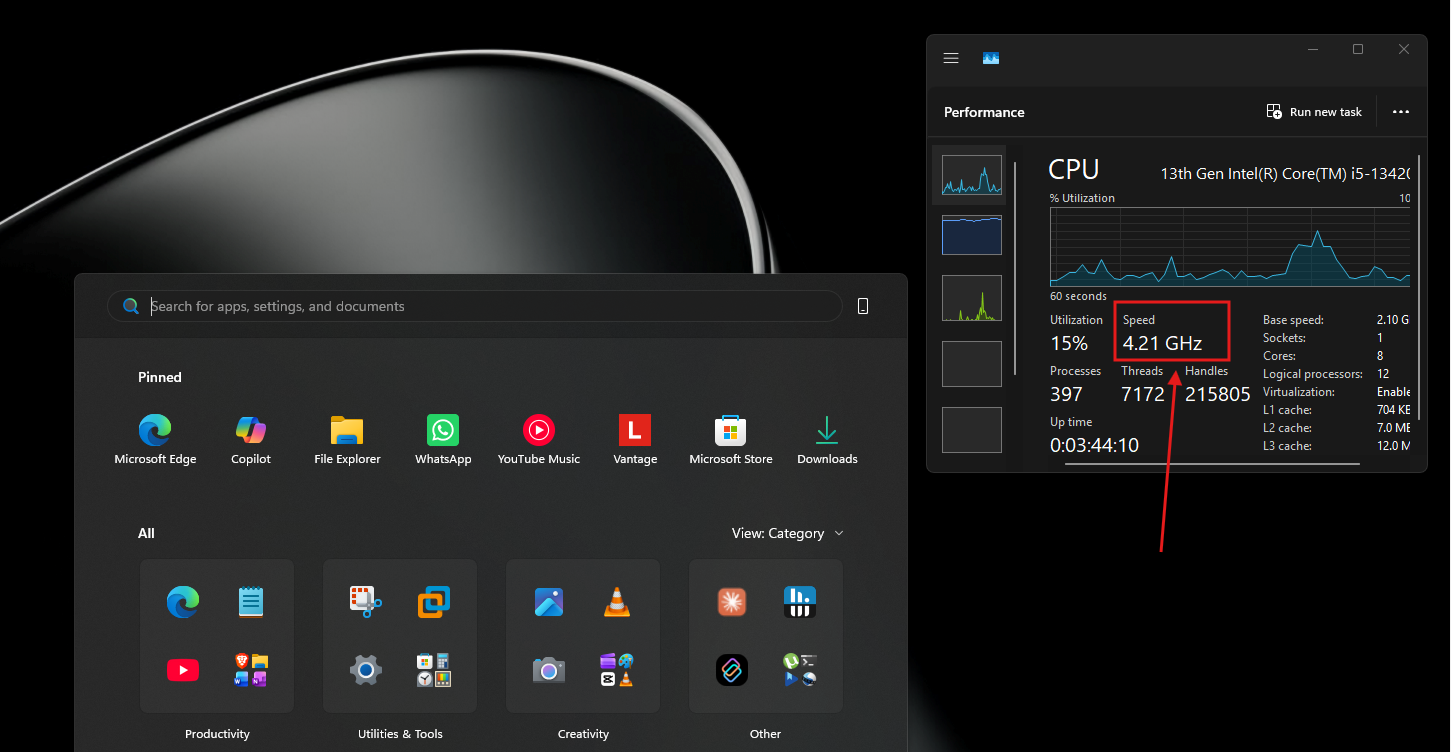
In the simplest of words, Low Latency Profile is a technique by which your CPU boosts speed instantly to its max value when you click the Start menu, Search, Action Centre, or any apps, making them open faster than before.
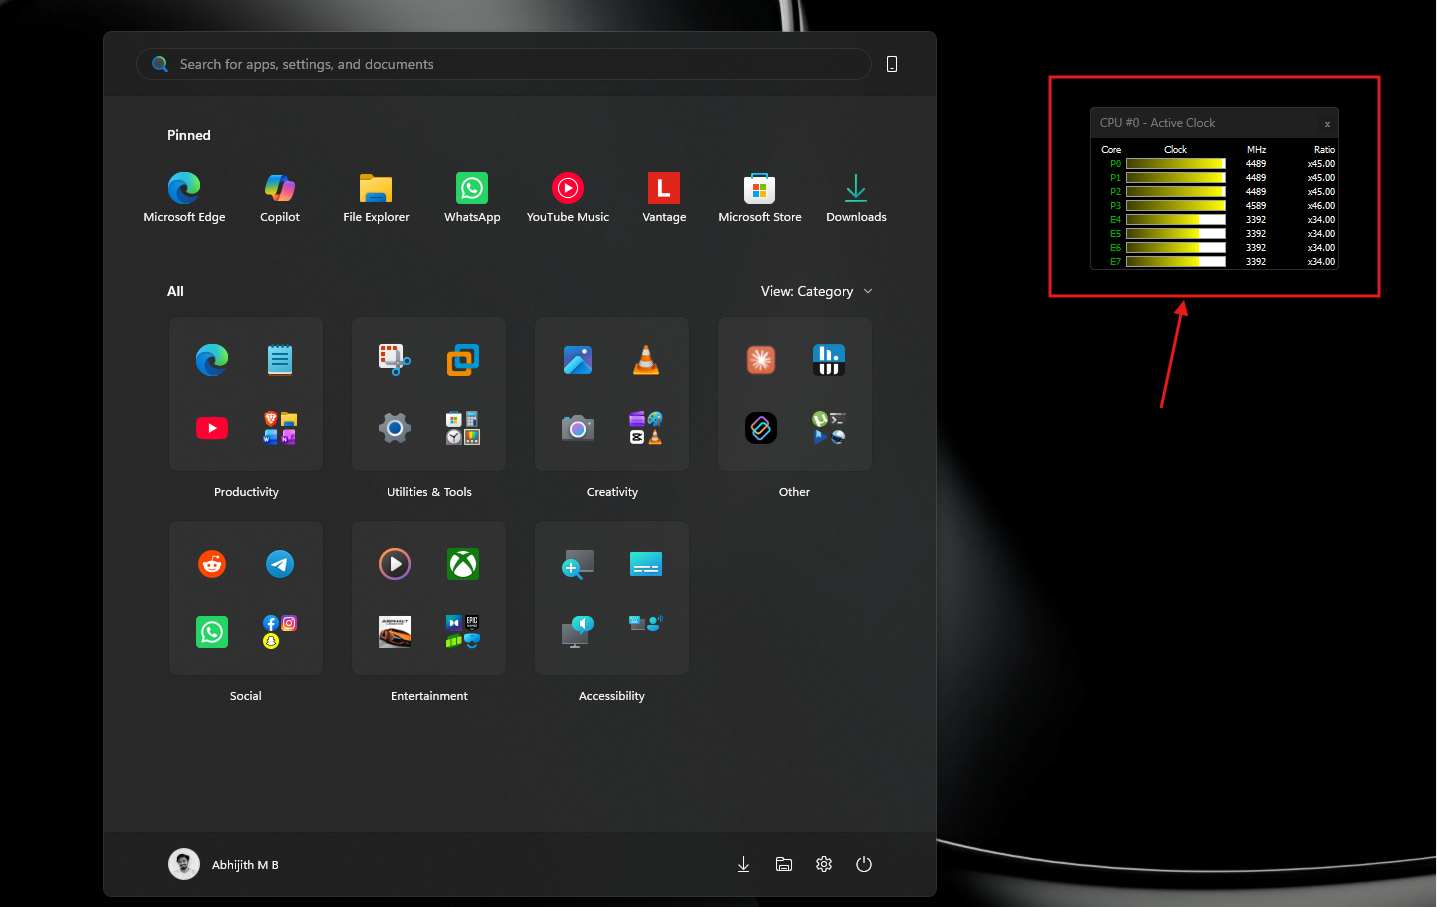
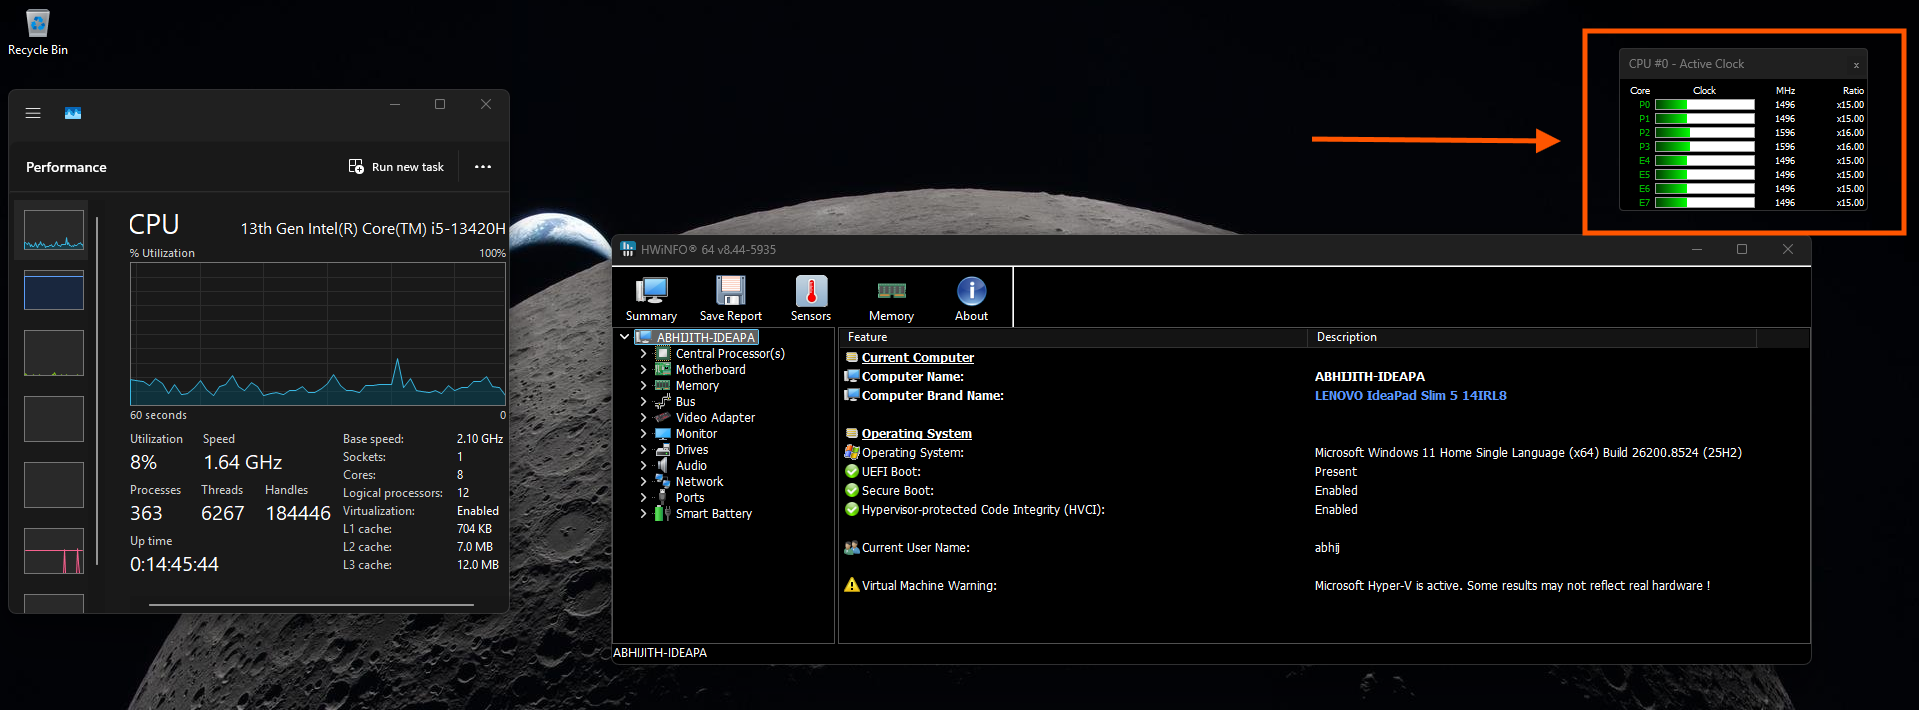
Here, you can see how the CPU speed (frequency) goes to its maximum value while opening the Start menu. But since this is a fairly powerful processor, the CPU utilization doesn’t take a hit, and hence, no issues with battery or heating.
Normally, when you trigger any of these actions, the Windows CPU scheduler takes a moment to ramp up the processor clock before it can handle the rendering workload. On budget PCs and older hardware, that ramp-up delay is what causes the slight hesitation you feel before the flyout appears.
Low Latency Profile bypasses that gradual ramp-up. The moment Windows detects an interactive trigger, it immediately spikes the CPU to its maximum frequency for a brief burst of one to three seconds, which is just long enough to render the shell element and complete the response. After that, the CPU drops back down to its normal idle state.
Critics argued whether this is just a brute-force trick and not real optimization. It is actually a well-established technique. Every modern operating system does a version of it.
The concept is sometimes called “race to sleep”: the CPU works at maximum speed for a very short time, completes the task faster, and then spends more time in a deep low-power state between interactions. Apple’s devices have used similar scheduler behavior for years for interactive responsiveness.
Microsoft is not inventing anything new here; it is catching up to something that already works well elsewhere.
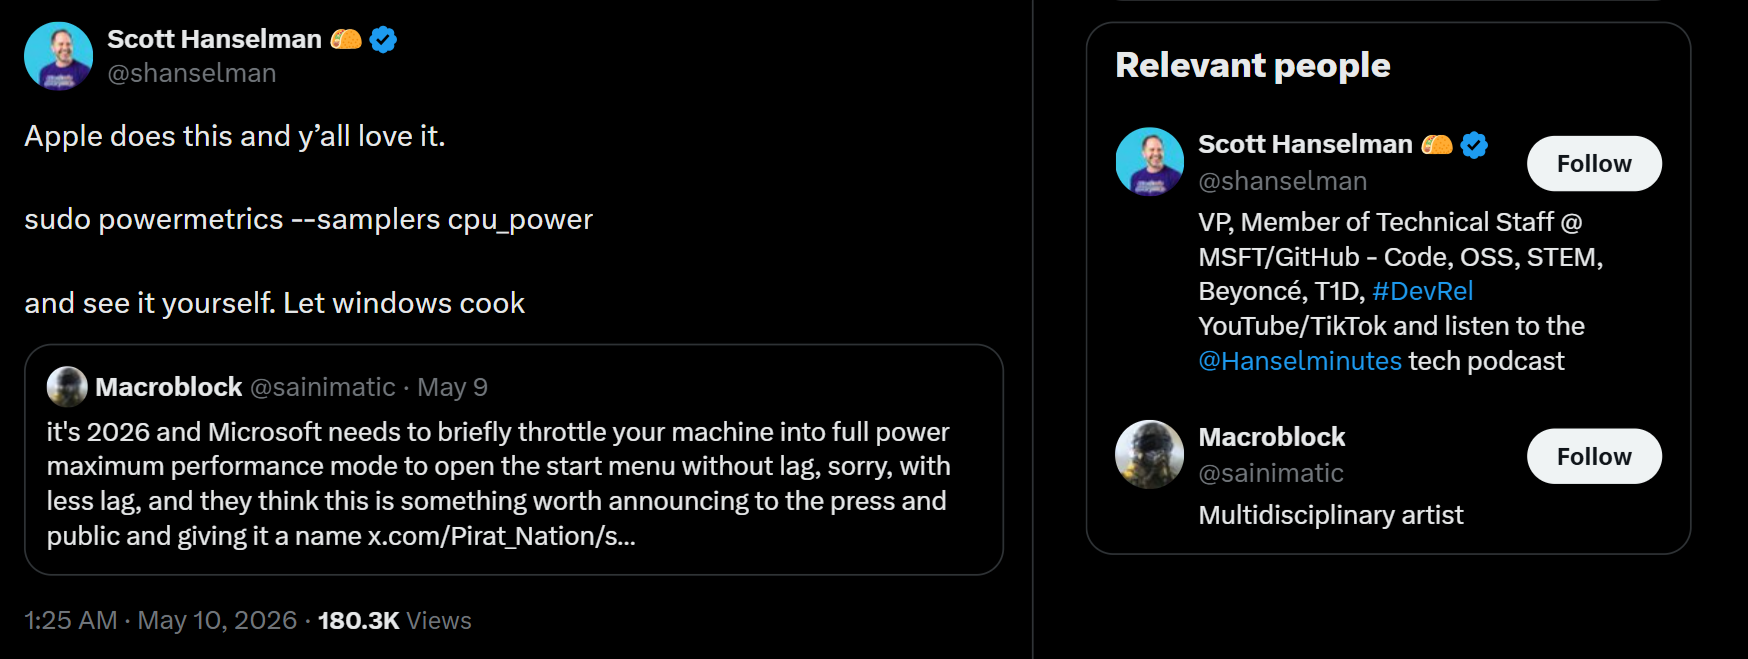
We covered the controversy this sparked when it was first announced. Microsoft VP Scott Hanselman defended the feature against criticism that it was a lazy fix, and his argument holds up. The battery and thermal impact are minimal because the spike is too brief to register in any meaningful power draw measurement.
Now, one important thing to know upfront is that Low Latency Profile has the most visible impact on budget and mid-range PCs and older hardware. If you are running a high-end desktop or a premium flagship laptop with a fast processor and NVMe storage, your shell experiences were already snappy, and the CPU boost may not produce a jaw-dropping difference. The feature is still active on fast hardware, but the improvement is subtler.
Step 1: Install the June 2026 Patch Tuesday update first
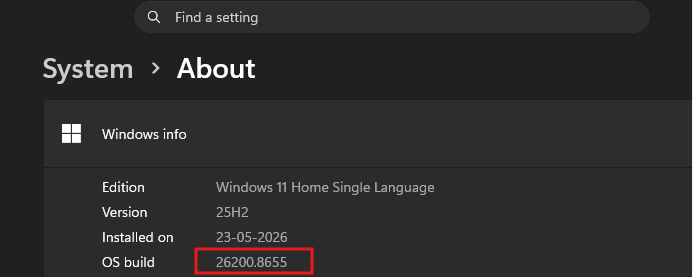
Before anything else, the June 2026 Patch Tuesday update needs to be installed on your PC. To check, open Settings > System > About and look at the OS Build number. You need to be on Build 26200.8655 or 26100.8655 (for 25H2 and 24H2, respectively) or newer.
If you are not there yet, go to Settings > Windows Update > Check for updates and install the update first.
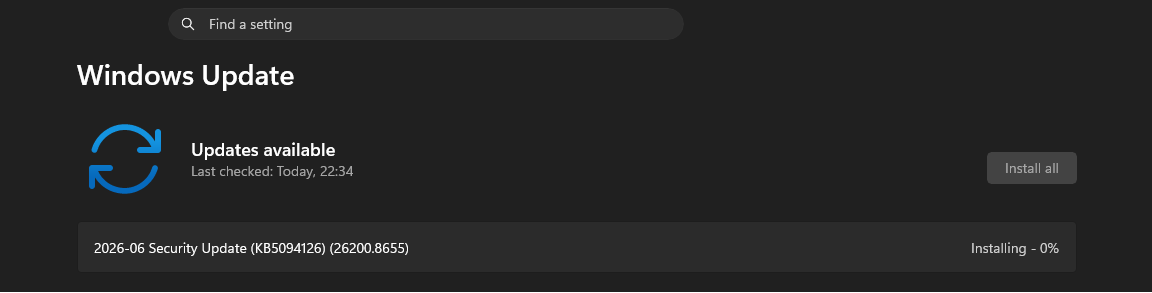
Once the update is installed and your PC has restarted, you can move on to checking whether Low Latency Profile has been activated on your device.
Why Low Latency Profile may not be active on your PC yet
Microsoft uses a system called Controlled Feature Rollout (CFR) to activate new features on a subset of devices at a time, and gradually roll out to everyone to ensure stability.
What this means is that your PC will have all the code for Low Latency Profile installed, but it remains dormant until Microsoft’s servers signal it to activate. There is no notification or Settings toggle. It just starts working silently in the background.
There is also no way to tell from Settings or Windows Update whether Low Latency Profile is active on your specific device. The only way to find out is to actually monitor your CPU behavior while using the shell, which is what the next steps will walk you through.
Step 2: Install HWiNFO to monitor CPU frequency in real time
Task Manager can show CPU usage percentage, but its polling rate is too slow to catch the brief frequency spikes that Low Latency Profile produces. By the time Task Manager refreshes, the spike has already come and gone. What you actually need to check is the CPU frequency in Task Manager.
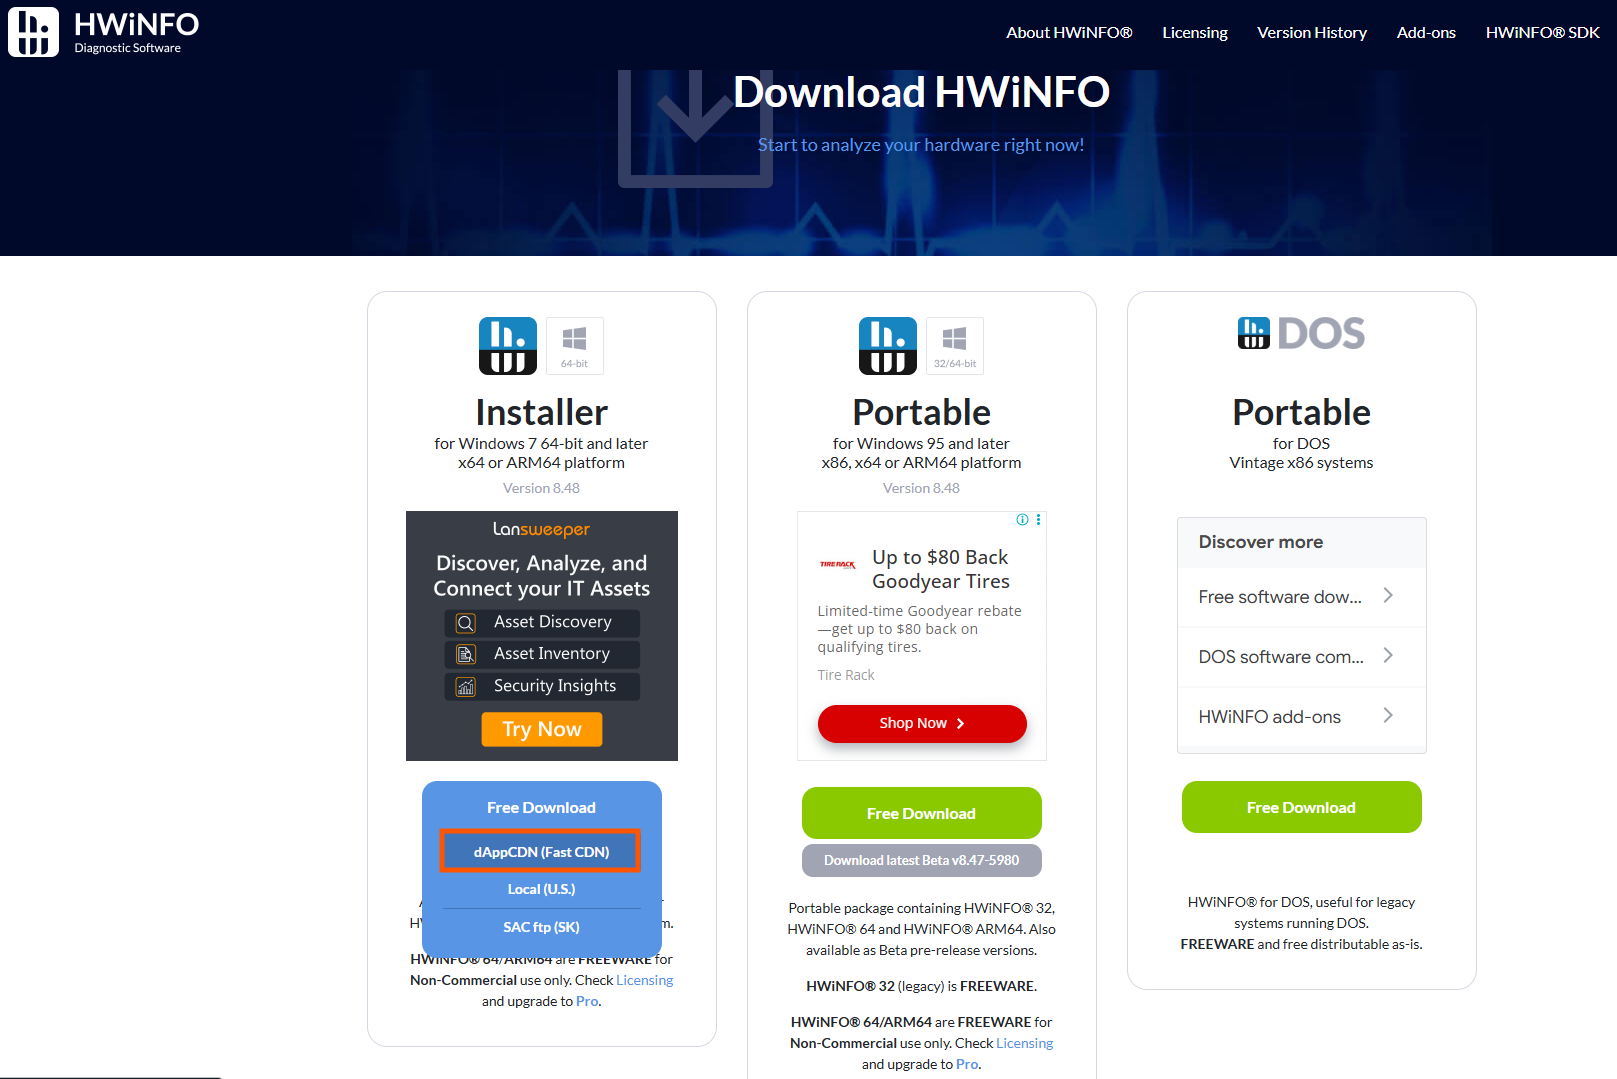
But to see the CPU spikes, I recommend HWiNFO, a free hardware monitoring utility that updates sensor readings far more frequently.
Head to the official HWiNFO website at hwinfo.com and download the free version.
Once HWiNFO is installed, here is how to set it up for monitoring:
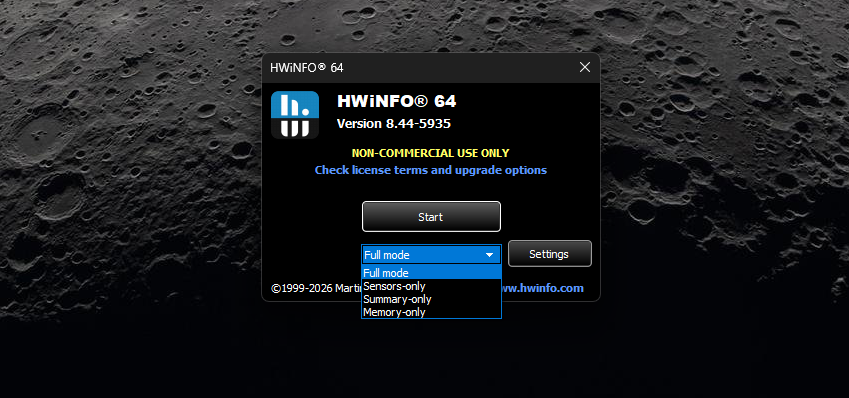
- Launch HWiNFO. At the startup screen, you will see options for Summary Only, Sensors Only, and a regular full mode. Select Full and click Start.
- Keep the HWiNFO sensors window visible on one side of your screen. You are going to use it to watch what the CPU does the moment you open Start, Search, or Action Center.
Step 3: Check if Low Latency Profile is already active on your PC
With HWiNFO running and the CPU clock readout visible, now trigger the shell experiences one at a time and watch the frequency value:
- Press the Windows key to open the Start menu.
- Click the Search bar on the taskbar.
- Click the time/date area or the network icon to open Action Center.
Watch the CPU clock frequency in HWiNFO at the exact moment each flyout begins to open. If Low Latency Profile is active, you will see the CPU frequency jump to its maximum rated speed, or close to it, the instant you trigger the interaction, and then drop back within a couple of seconds.
On my regular PC, which already has Low Latency Profile from May, I saw the CPU jump from around 1.5 GHz at idle to its full 4.5 GHz turbo frequency the moment I pressed the Windows key, and it was back down to around 1.5 GHz before the Start menu had even fully animated in.
Low Latency Profile is active:
If you see those brief, sharp spikes in HWiNFO when you open shell elements, congratulations. Low Latency Profile is active on your PC and working as intended. You do not need to do anything further.
But in most cases, the following will be what you’ll see:
If the CPU frequency barely moves when you trigger those same interactions, and you see no spike at all, Low Latency Profile has not been activated on your device by Microsoft’s CFR system yet. Move on to the next step.
Low Latency Profile is not active:
Step 4: Force-enable Low Latency Profile with ViVeTool if it is not active
If CFR has not activated Low Latency Profile on your device yet, you can force it on using ViVeTool, an open-source command-line utility that lets you toggle Windows features that are gated behind CFR. We used ViVeTool to enable it during the May optional update period as well, and the process is the same here with an updated feature ID.
Download and set up ViVeTool
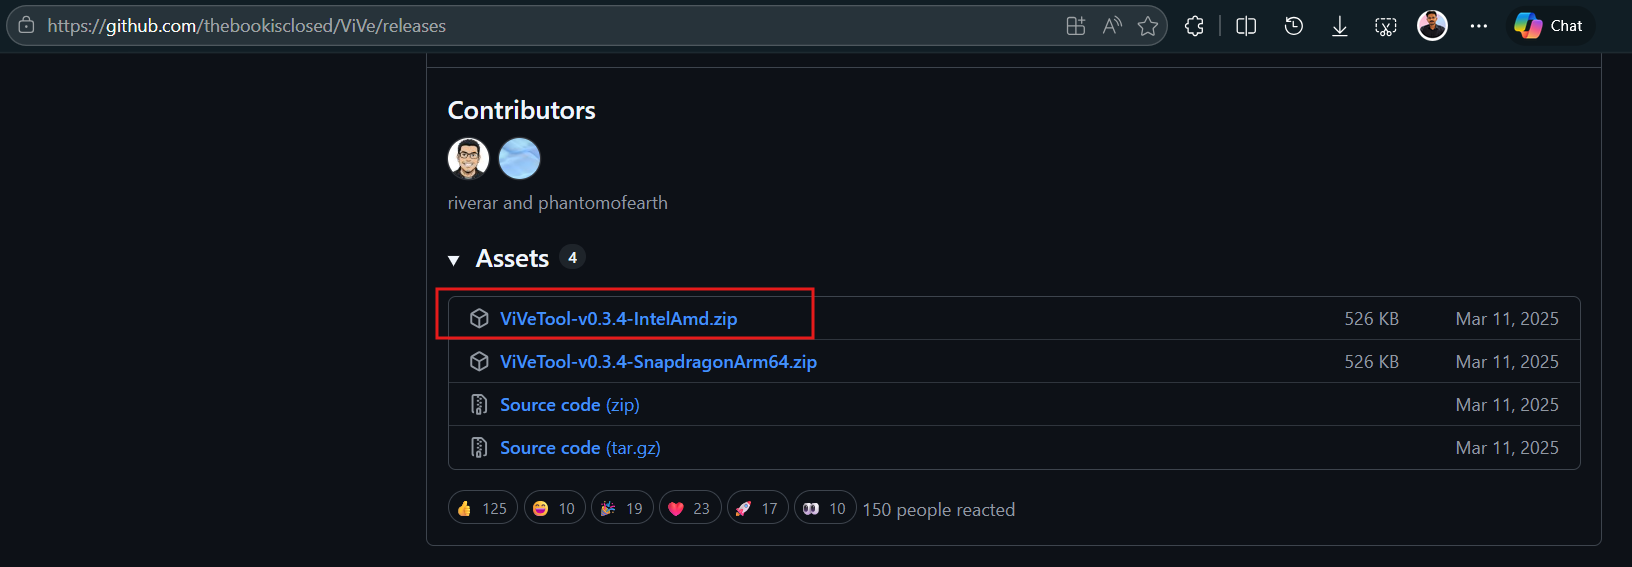
- Go to the official ViVeTool GitHub releases page and download the latest .zip release.
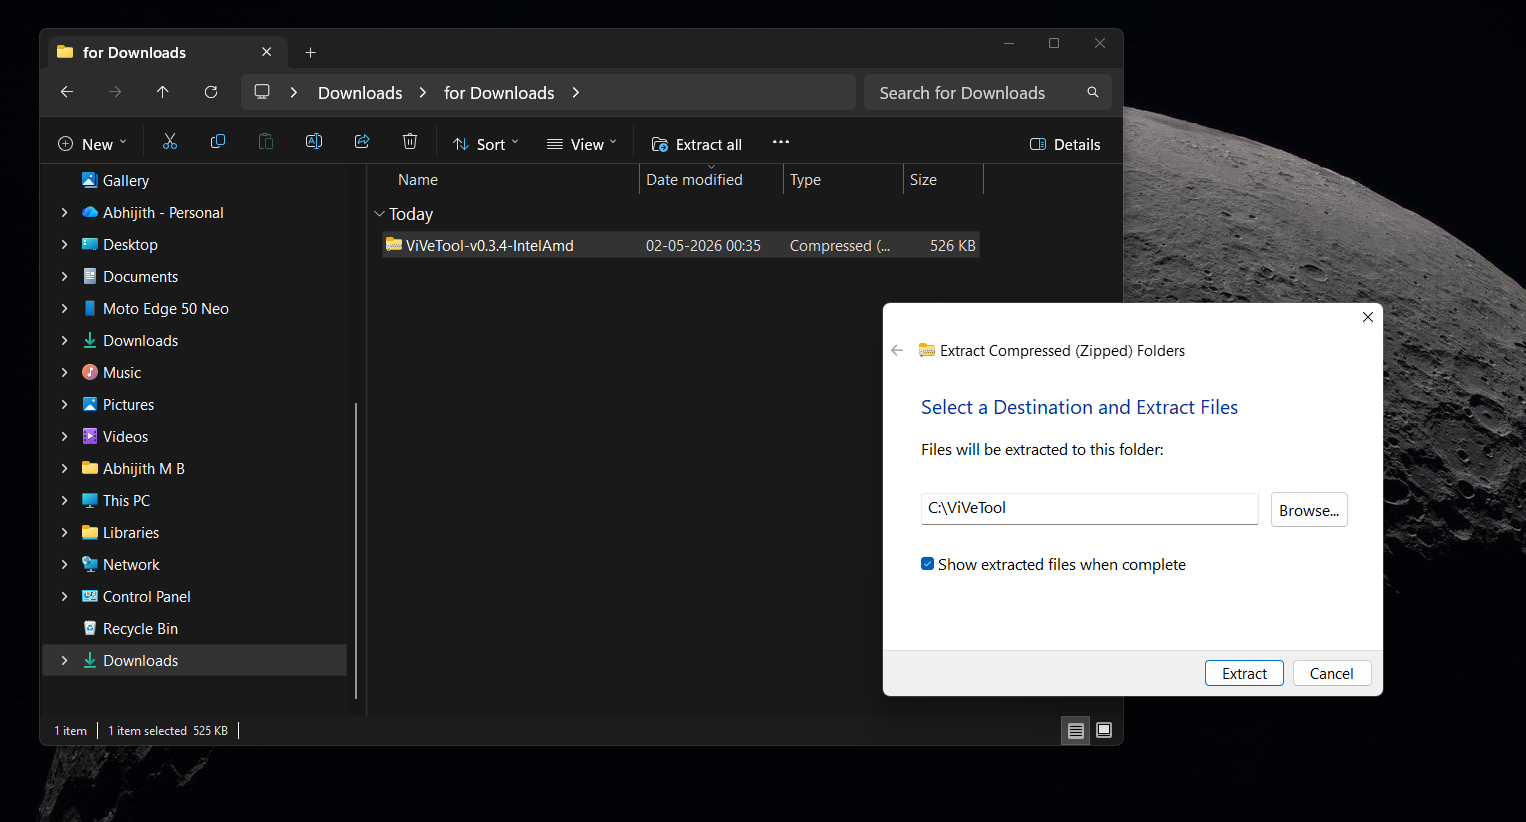
- Extract the contents of the .zip file to a folder. For simplicity, extract it directly to C:\ViVeTool so it is easy to navigate to in Command Prompt.
Enable the feature using the June 2026 feature ID
- Right-click the Start button and select Terminal (Admin), or search for Command Prompt, right-click it, and select Run as administrator.
- In the elevated terminal window, type the following command to navigate to the ViVeTool folder:
cd C:\ViVeTool 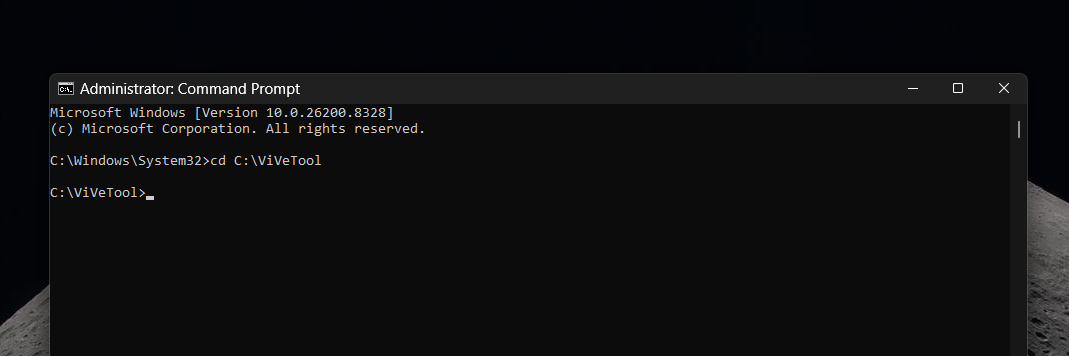
- Now run the following command to enable Low Latency Profile:
vivetool /enable /id:58989092
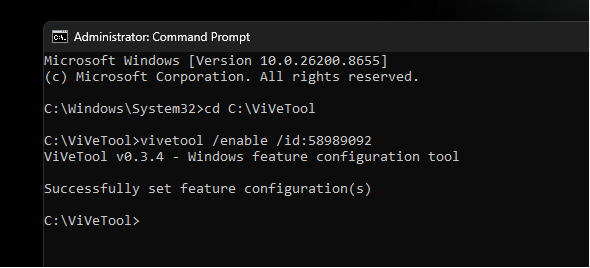
- You should see a confirmation message saying the feature configuration was successfully set. Restart your PC for the change to take effect.
How to test if Low Latency Profile is working?
After restarting, go back to HWiNFO and repeat the same check from Step 3. Open the Start menu, Search, and Action Center, and watch the CPU frequency readout. You should now see those brief sharp spikes on every shell interaction. The Start menu and other flyouts should feel more immediate, particularly if you are on a mid-range or older device.
Start menu after enabling Low Latency Profile:
Windows Search opens faster after enabling Low Latency Profile:
Action Center is smooth after enabling Low Latency Profile:
If you had little to no CPU spike earlier and now you’re getting max CPU spikes, along with smoother shell experiences, it’s safe to say that Low Latency Profile is officially active on your device.
What I noticed while testing, and why the CPU spikes are nothing to worry about
When I ran through my testing after enabling Low Latency Profile, the difference on a budget-class VM was immediately obvious. I had set up a constrained environment with just two CPU cores and 4GB of RAM to simulate a lower-end PC. Before Low Latency Profile, opening the Start menu on that setup had a perceptible delay. After enabling it, the menu snapped open.
Start menu opens fast on a 4GB dual-core PC with Low Latency Profile:
On my regular everyday PC, the change was subtler but still present. The Start menu and Search flyout both felt a bit smoother while opening. Of course, it might not be visible in the screen recording below, but as someone who always notices the micro-stutters of the Start menu and Search, I can certainly tell the difference.
Windows shell experiences after enabling Low Latency Profile:
One thing I want to address is the concern about whether these CPU spikes are harmful. They are not. The duration is short, typically one to two seconds per interaction. Because the CPU completes its work at maximum speed and returns to idle much faster, it actually spends more total time in its deep low-power sleep states between interactions. This is the same principle behind “race to sleep” in mobile processor design. The CPU works hard for a very short period, gets the job done, and goes back to resting.
I noticed no change in surface temperatures and no change in battery discharge rate during my testing sessions. The spikes just do not last long enough to build up heat or pull meaningful wattage from the battery over time.
Low Latency Profile is just one part of the June 2026 update
Low Latency Profile is the most talked-about addition in the June 2026 Patch Tuesday update, but it is far from the only one. We went through everything in detail in our full article on everything new, improved, and fixed in the Windows 11 June 2026 update.
The update also brings Shared Audio, which lets two people listen from the same PC through their own Bluetooth headphones simultaneously. Some other notable changes:
- Multi-App Camera is included as well, ending the long-standing one-app-at-a-time webcam lock.
- Task Manager now shows NPU usage across individual processes for the first time.
- Windows Search finds files with as few as two characters.
- Windows Hello now reliably defaults back to face and fingerprint sign-in after every session.
Finally, Secure Boot certificate updates roll out immediately as part of the mandatory normal rollout, which alone makes June the most important update to install this year.
If you have not already installed KB5094126, go to Settings > Windows Update > Check for updates and get it installed. Then follow the steps in this article to check whether the Low Latency Profile has activated on your device, and force it on with ViVeTool if it has not